Key Features
- Customisable RSVP questions
- Guest list management
- Unique identifiers for each guest family
- Integration with PixInvite for seamless e-invitations (on supported plans)
- Available on all PixVow packages, including the free version
Managing PixRespond
During the process of creating an event, you’ll have the opportunity to set RSVP questions. You can also fully manage PixRespond via your Host Dashboard for the event.Managing Your Guest List
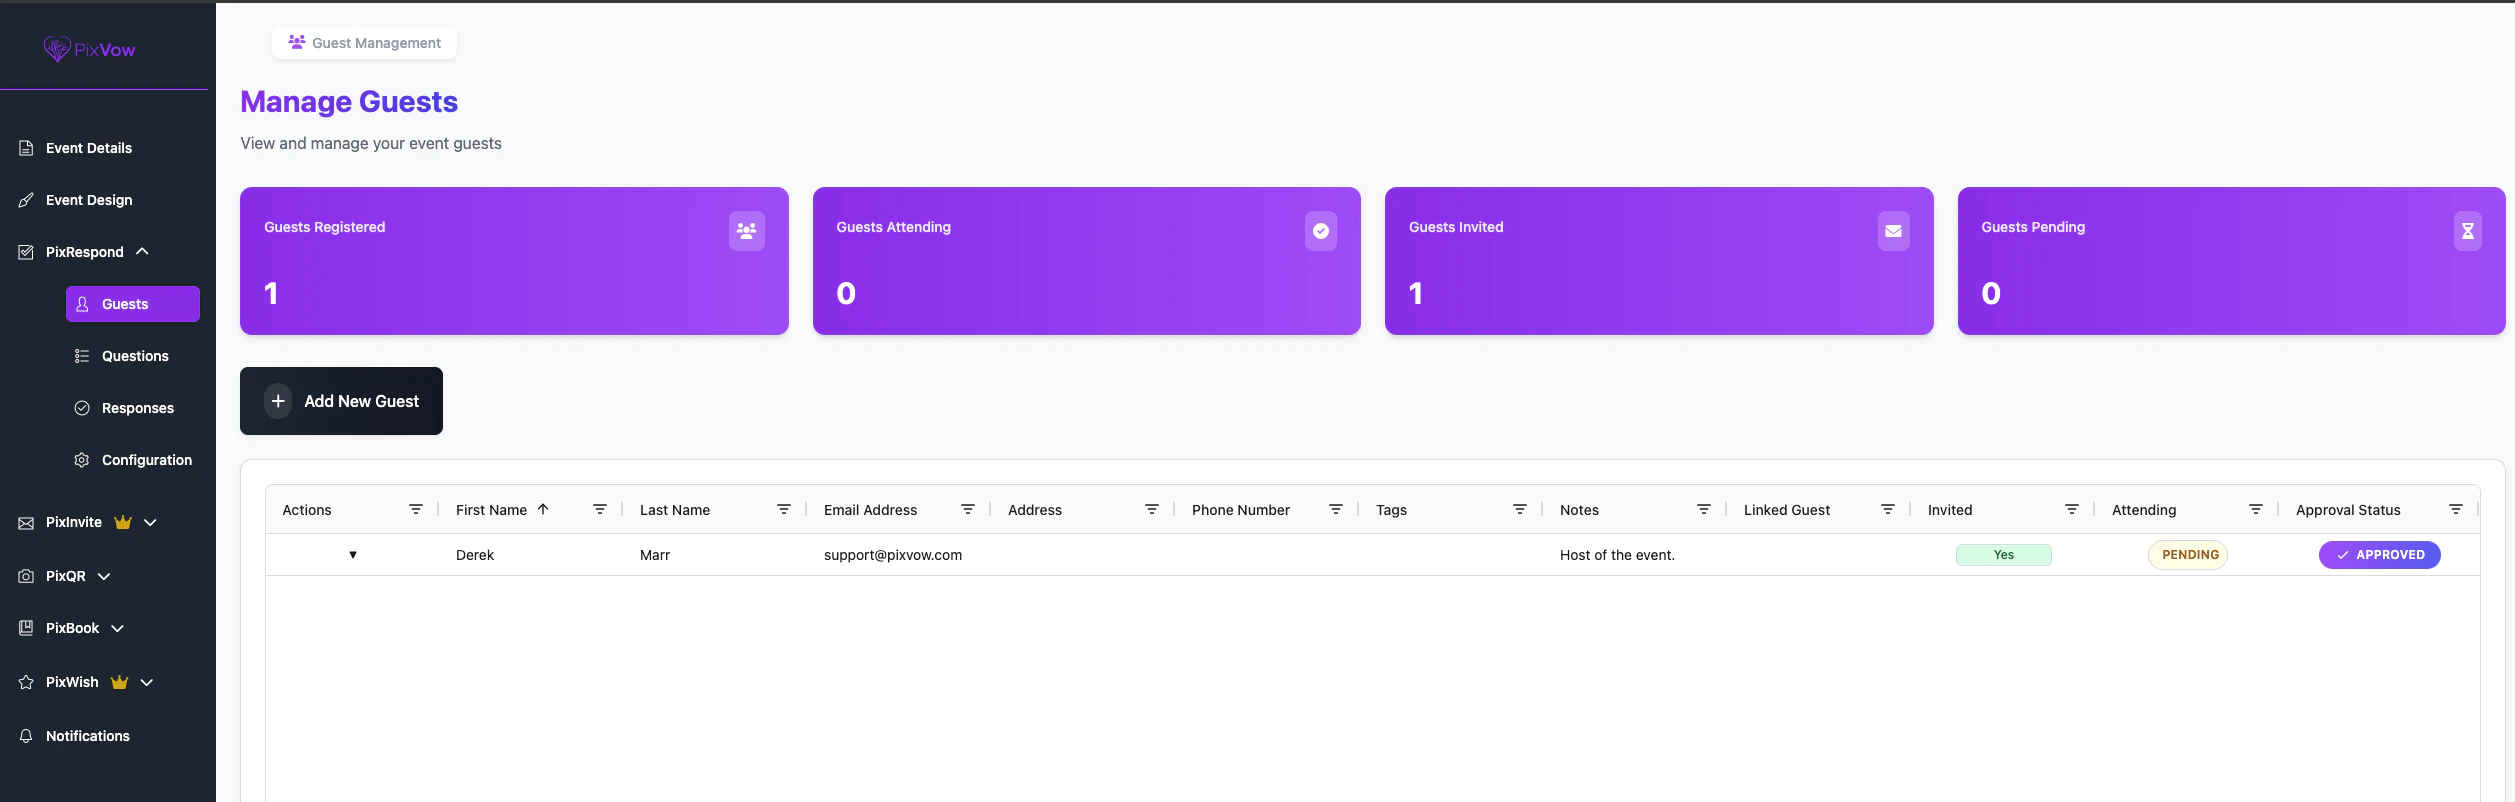
After creating your event, you can access the host dashboard to manage your guests:- Go to your Host Dashboard
- Navigate to the PixRespond section and click on Guests
- Here you can:
- Manage your guests
- View a quick summary of how many guests have registered, responded, been invited and how many you’re waiting for a response from.
Adding a Guest
- Click the Add New Guest button
- A modal/pop-up will show where you can enter the information of a guest. Every set of guests needs to have one (1) Primary Guest. This is the guest that will receive any invites if using PixInvite.
- Enter at least the First Name, Last Name & Email Address of the Primary Guest. All other fields are optional information for you to collect.
Each family of guests is assigned a unique identifier. This identifier can be used with your event link to allow guests to complete the RSVP process.
Understanding Guest Options
When viewing the list of your guests, all guests will show including those that are linked to other guests. A drop-down arrow will appear to the left of each guest and once clicked, you’ll see these options:- Edit — Opens a modal/pop-up to edit the guest information
- Mark as Invited (or Uninvited) — Switch the status of the invite status of a guest
- View Responses — Takes you to a filtered list of the Responses for this guest
- View Stats* — View the deliverability & insights of the e-invite sent
- Copy Guest ID — Copy the unique Guest ID to your clipboard so you can provide it to your guest
- Send Email Invite* — Sends an e-invite to the Primary Guest with the current design that’s been created in PixInvite
- Send SMS Invite* — If a UK number is populated for the Primary Guest, sends a SMS text message based on the message text set in PixInvite
*Some options are only available with other features unlocked in higher-tier PixVow plans, such as PixInvite
Managing Questions
Questions set for PixRespond can be accessed by:- Go to your Host Dashboard
- Navigate to the PixRespond section and click on Questions
- Here you can:
- View the total number of questions you have set for your guests
- Add/Edit/Delete a question
- Text: Open-ended responses
- Select: Single choice from multiple options
- MultiSelect: Multiple choices from a list of options
Adding a new Question
If you need to add a new question or didn’t add any during the event creation wizard, you can do so here:- Click ‘Add New Question’ button
- Enter your Question Text
- Set your Question Category (Meal Preference, Dietary Restriction, Generic Question)
Your guests will be asked these questions in the following order: Attendance, Meal Preference, Dietary Restriction, Generic Question
- Set your Question Category
Editing / Deleting a Question
You can use the drop-down button to the left of a question to Edit an existing question or delete it entirely.Deleting a question will remove any responses for guests that have already sent their RSVP with that question completed.
Viewing Responses
You can view the Responses for all guests or filter to specific guests.- Go to your Host Dashboard
- Navigate to the PixRespond section and click on Responses
- Here you can see:
- Total responses submitted
- Total number of guests who have submitted responses
Configuration
There are some configuration options available for PixRespond which are available here:- Go to your Host Dashboard
- Navigate to the PixRespond section and click on Configuration
Response Deadline
You can configure how long your guests will be able to RSVP before the option becomes disabled. This is useful if you have a deadline to send to your vendor for Meal Preferences.Join Request Settings
You can allow guests to request to join your event. This is useful if you’re having an ‘open’ event in which you don’t know who could be attending your event but you still want to track them within PixVow. In addition to allowing guests to request to join, you can also auto-approve them so you don’t need to manually approve them. Once a guest has been approved, they’ll just be like any other guest who you added to your event.If Auto-Approve Guests is disabled, you’ll need to Approve any requests. Guests needing approval will be shown in the Guests tab of PixRespond, where their Approval Status will show as ‘Pending’.
RSVP Process for Guests
Guests can RSVP to your event in a few ways:- Via Link: Guests use their unique identifier with your event link to access the RSVP form
- Via PixInvite: If you’re using PixInvite (available on select PixVow packages), guests can click directly on their e-invitation to access the RSVP form
- Via Event Page: Every event page will have a RSVP button. If the guest is logged in with a PixVow account associated with your event, we’ll load their details otherwise we’ll ask them to enter their Guest ID. As the host, you can provide their Guest ID.*
A guest doesn’t need to be part of your event to RSVP. You can allow guests to request to join your event and even auto-approve the requests. See Configuration for more information.
Best Practices for Using PixRespond
- Keep your questions concise and clear
- Only ask for information you truly need
- Use the appropriate question type for each query
- Set a reasonable RSVP deadline
- Regularly check and follow up on responses